Pages

Showing posts with label baking. Show all posts

Saturday, 6 September 2014

Guest post #2 - Home made scones

My second guest blog post is from Cheryl who blogs over at Peppermint and Pearls


Ingredients


350g self raising flour
¼ tsp salt
1 tsp baking powder
85g butter, cut into cubes
3 tbsp caster sugar
175ml milk
1 tsp vanilla extract
Squeeze of lemon juice
Beaten egg
Jam and clotted cream


Method

1. Preheat oven to 200 degrees/180 degrees for fan ovens.

2. Put the flour into a large mixing bowl along with the salt and baking powder, mix together.


3. Add the cubes of butter and mix together with your hands until the mixture resembles crumbs.


4. Put the milk into a jug and microwave for 30 seconds, the milk should be warm but not hot.

5. Add a squeeze of lemon juice and the vanilla.

6. Put a baking tray in the oven – the scones need to go onto a hot tray to bake.

7. Make a well in the flour mixture and pour in the milk.


8. Combine the dry and wet mixtures together with a knife.

9. Scatter flour onto your work surface and place the dough on top of it.

10. Pat the dough out – do not knead it. Once you have worked it out so it is smooth, pat it into a round that should be about 4cm deep.

11. Using cutters cut out the scones, re-work the dough until you have as many scones as possible.

12. Brush each scone with some beaten egg and place onto the hot baking tray.


13. Bake for 10-15 minutes.


14. Serve with jam and loads of clotted cream, seriously, go mad for the clotted cream.


15. Enjoy warm or cold with a nice big mug of tea.


Thursday, 20 March 2014

My carrot cake... I love Mary Berry!

We held a Great Welsh Bake Off in work this week so I decided to bake a carrot cake as I'd never made one before. It was a risky strategy and it would probably have been safer to bake my apple, cinnamon and walnut cake again, but I'm very keen to try something different every time I put my metaphorical baking hat on. I'm also a big fan of carrot cake and I wanted to see if I could make one that tasted as good as the carrot cake Neil made me for my birthday.

I used my beloved Mary Berry 'Cakes and Bakes' book again for the carrot cake recipe... the woman is amazing and she's never failed me yet!

Here's how the cake turned out:


So how did I make it? Read on and find out!


Ingredients

225g self raising flour
2 level tsp baking powder
150g light muscovado sugar
50g walnut pieces, chopped
100g carrots, coarsely grated
2 ripe bananas, mashed
2 large eggs
150ml sunflower oil

For the topping:
250g mascarpone cheese
2-3tsp vanilla extract
2 tbsp icing sugar, sifted
25g walnut pieces, chopped

You'll also need a deep, round 20cm cake tin. I used my 23cm springform cake tin and it turned out fine with no problems. 


Method

1. Preheat the oven to 180C / Fan 160C / Gas mark 4. Lightly grease the cake tin and line the base with non-stick baking paper. Lining the base is always the part I hate most about every baking experience!

2. Put all the ingredients for the cake into a large bowl and mix until thoroughly blended. 


3. I put all the dry ingredients in first (flour, sugar, baking powder, walnuts and carrots). I love the look of the grated carrots! The sugar, however, does not look appetising. 


4. I then added the mashed bananas (messy!), then put in the eggs and the sunflower oil. An electric mixer is preferable for blending the mixture but you can also beat by hand with a wooden spoon. I used my electric mixer and it worked perfectly as the mixture wasn't too thick, as has been the case with my last few baking adventures!


5. Next, turn the mixture into the prepared tin and gently level the surface. The mixture didn't look very tasty at this point! However, it was an excellent consistency so it was very easy to level the surface properly. 


6. Bake for 50-60 minutes until the cake is well risen, golden and beginning to shrink away from the sides of the tin. Allow the cake to cool in the tin for a few minutes, then loosen the side of the cake from the tin with a blunt knife, turn the cake out onto a wire rack and leave to cool completely. As you can see from the photograph below, my cake did start to crack at the top but this didn't matter once I put the topping on. 


8. For the topping, put the mascarpone cheese into a small bowl, add the vanilla extract and icing sugar and beat together. You can also add the walnuts into the mixture if you want to, but I chose to decorate the top of the cake with them instead. 


9. Spread evenly over the top of the cake, then store your iced cake in the fridge. 


I was really pleased with the finished result... I used low fat mascarpone cheese for the icing so I don't think it tasted as rich as it could have, but overall I think it was a successful attempt! I was also worried about including the bananas as they tend to have quite an overbearing taste, but the banana flavour was very subtle and they made sure that the cake very moist. I think this cake actually had the best texture out of everything I've baked so far because it was so lovely and moist.


Does anyone have an alternative recipe for carrot cake, or have you ever tried Mary Berry's recipe? Let me know! 

Wednesday, 5 March 2014

Apple, cinnamon and walnut cake... birthday surprise!

It was Neil's birthday last weekend so I thought I'd bake him a surprise birthday cake. I've baked quite a lot of different things in the last year or so (shortbread, brownies, cupcakes, muffins etc), but I've never baked an actual cake so I was keen to set myself a new challenge. I dug out my trusty Mary Berry book and decided on the apple, cinnamon and walnut cake. Seriously, how good does that combination sound?

It turned out like this... I think this is actually the tastiest thing I've ever baked, and Neil agreed!


So here's how I made it...

Ingredients 
225g unsalted butter, softened
225g light muscovado sugar
3 large eggs
100g chopped walnuts
100g sultanas
225g self raising flour
2 level tsp baking powder
400g cooking apples (peeled, cored and grated)
1 level tsp ground cinnamon
Extra light muscovado sugar, for sprinkling
Extra chopped walnuts, for sprinking
Icing sugar, for dusting

You will also need a deep, round 23cm cake tin. I used a springform tin which worked with no problems, apart from the minor ones listed below!


Method 

1. Preheat the oven to 180C / Fan 160C / gas 4. Grease the tin and line the base with non-stick baking paper. 

2. Measure the sugar, chopped walnuts, sultanas, flour, baking powder, eggs and butter into a large bowl and beat for about 2 minutes until the mixture is thoroughly blended. 


3. I added the dry ingredients first, then added the butter and the eggs. I needed to beat for a lot longer than 2 minutes... the mixture was very thick! What is it with me and thick mixture?


4. Spoon half the mixture into the prepared tin. As you can see, I didn't quite soften my butter enough! Good lesson for next time, as this is probably why my mixture was extra thick. 


5. Spread the grated apple and ground cinnamon in an even layer on top. Spoon the remaining cake mixture on top, level the surface then sprinkle generously with light muscovado sugar and walnuts. This step was fairly difficult as the cake mixture was so thick, but there was thankfully enough left to spread an even layer over the grated apples. 


6. Bake for 75 minutes to 90 minutes, or until the cake is well risen and golden brown. Shortly after I put the cake into the oven, I noticed that there were tiny droplets coming from the bottom of the springform tin. I just put a layer of foil underneath it to catch the drips, and next time I'll wrap the bottom of the tin in foil just in case. 

7. After taking the cake out of the oven, leave to cool in the tin for a few minutes then turn out, peel off the parchment and finish cooling on a wire rack.


8. Dust with a generous sprinkling of icing sugar to serve. I know it doesn't taste of anything, but it makes the cake look pretty! I'm so proud of this cake and the way it looked when it was cut up... my biggest fear about baking a cake was that it would be too crumbly to even cut into decent slices. 


9. If it's a surprise birthday cake, add some candles!


Has anyone else tried Mary Berry's apple, cinnamon and walnut cake? What did you think? 

Wednesday, 19 February 2014

Valentine's surprise... salted caramel brownies

Regular readers of my blog will remember from last year's Valentine's post that I'm not a big fan of Valentine's Day. I don't believe in going all out and spending loads of money on one day every year... shouldn't we do little things every day (which don't necessarily cost lots of money) to show people that we love them?

Anyway, even though I never make a big fuss on Valentine's Day, I decided to bake a chocolatey surprise for Neil. I love baking and I hadn't had a chance to bake anything since before Christmas, so this also gave me a good excuse to use my new baking goodies!


My new apron!


As soon as I read Kaz's blog post on her salted caramel brownies, I knew I just had to try this recipe and that it was the perfect baking adventure for my surprise Valentine's Day treat. I made chocolate brownies last June which were rather amazing, so I thought it would be interesting to make a different kind of brownie this time.


Ingredients

180g plain flour
3tbsp cocoa powder
300g dark chocolate
150g unsalted butter
150g caster sugar
220g soft brown sugar
4 eggs
1tsp vanilla extract
50g chocolate chips (optional - I had some left over from a previous baking adventure!)
1 tin of Caramel
1 tsp salt


Can you tell that I shop in Tesco?


Method 

1. Preheat the oven to 160C and line your baking tin with baking paper. 

2. Place the chocolate and butter into a bowl over a pan of water and stir on a medium heat until it's all melted. I had to use a cereal bowl and a milk pan because I didn't have a large heatproof bowl... this is not recommended! Let's just say that the bowl was very full. 

3. Add the eggs, sugar and vanilla extract to a bowl, then add the chocolate/butter mixture and mix until smooth. I forgot that I was supposed to use two types of sugar so only put the caster sugar in... I then added the brown sugar a bit later on when I realised that I'd left it out. I don't think it made much difference, but just bear in mind that there are two types of sugar to add. I used my electric mixer... works like a dream!


4. Sieve in the flour and cocoa powder and beat the mixture until it's all combined. I also had to add the brown sugar here as I forgot to do this in step 3, and I also added the chocolate chips at this stage. My mixture was extremely thick at this point... possibly this was because I added the brown sugar at the wrong point. I used the electric mixer for a minute or two but then had to switch to a wooden spoon. As you can see from the photo below, my mixer was a bit clogged up!


5. Put half the mixture into the baking tin, making sure it's spread evenly. This step was very tricky as my mixture was so thick, so mine wasn't spread particularly evenly.


6. Add the salt to the tin of caramel, making sure you mix thoroughly. Add a layer of caramel on top of the brownie mix, making sure that you leave a small gap around the edge. 

7. Layer the remaining brownie mixture on top of the caramel. Again, this was very difficult as a result of my super thick mixture and I didn't quite have enough mixture left to cover all the caramel, as you can see below. 


8. Bake the brownies in the oven for approximately 30 minutes, then leave to cool before cutting up and serving. Mine were extremely moist and gloopy when they came out of the oven so I couldn't even cut them into squares, but the mixture solidified as it got cooler. As you can see, it didn't matter that I hadn't covered all the caramel with the brownie mixture as the top layer of chocolate seemed to be magically spread evenly after it came out of the oven. 


I was very worried when the brownies first came out of the oven as I couldn't cut them into chunks due to the moistness of the mixture, but they turned out fine in the end. I cut half the mixture into chunks (after I'd left it to cool for a while) and put the chunks into my new baking tin. I then put them on my little table with chocolates, a lit Yankee Candle and Valentine's card ready for Neil's arrival. I know, I know... I needn't have bought the chocolates, but the hazelnut praline in these Cadbury chocolates is so good!


Neil had also ignored the 'no presents' rule and arrived with a beautiful bunch of pink and red flowers and a little chocolate rose. We're a sneaky pair!


What did you get up to on Valentine's Day? Did you bake anything? Send me your links!

Wednesday, 8 January 2014

Christmas presents... the baking edition

This is the third post in my 'What I got for Christmas' series... I'm feeling very blessed to have had so many lovely presents. Thanks again, everyone!

After making shortbread for the first time a year ago, I've been well and truly bitten by the baking bug. I don't bake too often as I'm very wary about putting on weight (and about spending too much money on ingredients!), but I find it very therapeutic and rewarding when I do decide to do some baking. As a result, I decided to put some baking accessories on my Christmas list this year.


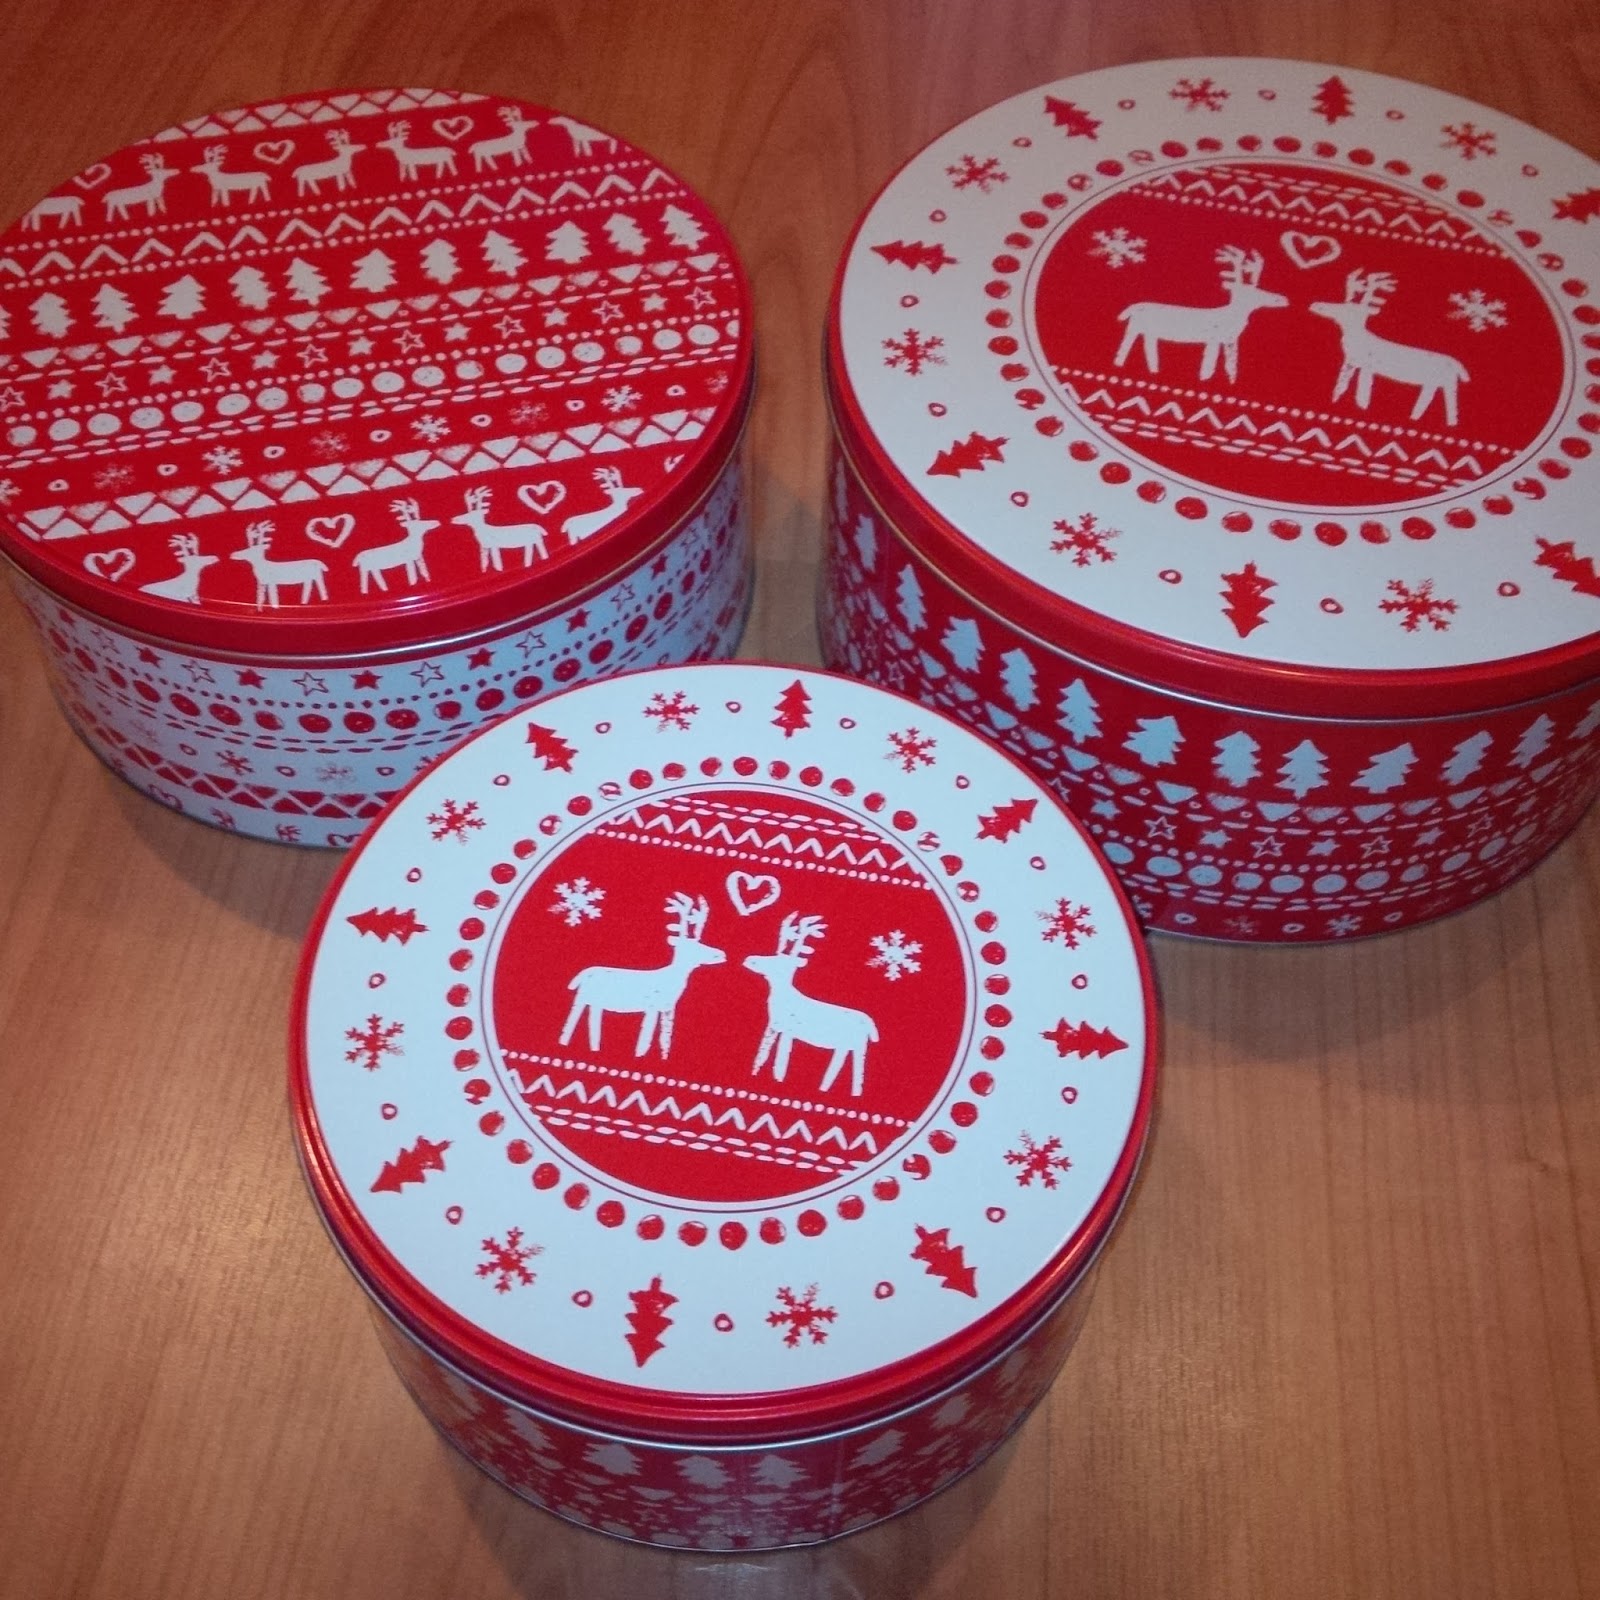
I love these pretty tins my parents bought for me for Christmas. I always store my baking creations in various tupperware containers which isn't ideal, so I was delighted with these tins which will be used especially to store my biscuits, cupcakes, brownies and whatever else I decide to bake in the neat future. They're so beautiful!


I also had this apron, baking mitt and tea towel set from my parents. I always end up with floury clothes (and shoes and face and hair...) whenever I do any baking so this apron will come in very handy. I also love the fact that my apron, oven mitt and tea towels will be coordinated! I love the cheery pattern on these items and will probably end up wearing my apron every time I cook to protect my clothes. I'm sure some people will think it's quite sad that I'm this excited about an apron... each to their own!


I also had this lovely Hummingbird Bakery book from Nicola which I mentioned in my first 'What I got for Christmas' post. I can't wait to bake some tasty items from my book while wearing my new apron, then storing the finished products in my new tins! 

Did you get any baking goodies for Christmas?

Saturday, 4 January 2014

Christmas presents... the entertainment edition

I won't be writing just one 'What I got for Christmas' post this year as I like to write about things in detail, so the post would be far too long with way too many photos. Instead, I thought I'd write a series of posts on the gifts I had for Christmas, split into a few different categories. I love categorisation.

I had so many lovely presents from my family, Neil, Neil's family, friends from work and other friends scattered around the country... thanks everyone! :)  Hopefully everyone enjoyed the presents I gave to them as much as I love the gifts from them.

The first category I've chosen is... Entertainment!

I had 5 DVDs for Christmas this year from my family. We watched Nativity 2 on Christmas Day, and I can't wait to watch the others. I've never seen Cars but I've heard great things about it. Toy Story is just a classic which everyone loves, and I loved Olympus has Fallen and Gatsby when I saw them in the cinema. I want to make sure I watch all my new DVDs before the end of January... I'll let you know how I get on. I think I might need a new DVD rack!


I also had the Nativity soundtrack for Christmas from my sister, brother-in-law and nephew. For those of you who know me well, you'll know that I absolutely love the Nativity and Nativity 2 films and soundtrack. With catchy songs such as Sparkle & Shine and Good News Song, I'll definitely be listening to this CD all year round and not just when it's Christmas!


I also had two lovely books for Christmas this year... The Hidden Magic of Walt Disney World from my brother, and The Hummingbird Bakery Cake Days book from Nicola, Mathew and Osian. The Disney book is already making me 'homesick' for Florida as I want to find out more and explore some of the hidden and fascinating facts detailed in the book, and I can't wait to bake some treats from the Hummingbird book. 


So I've got plenty to keep me occupied for the next few months! What DVDs, CDs and books did you have for Christmas?